
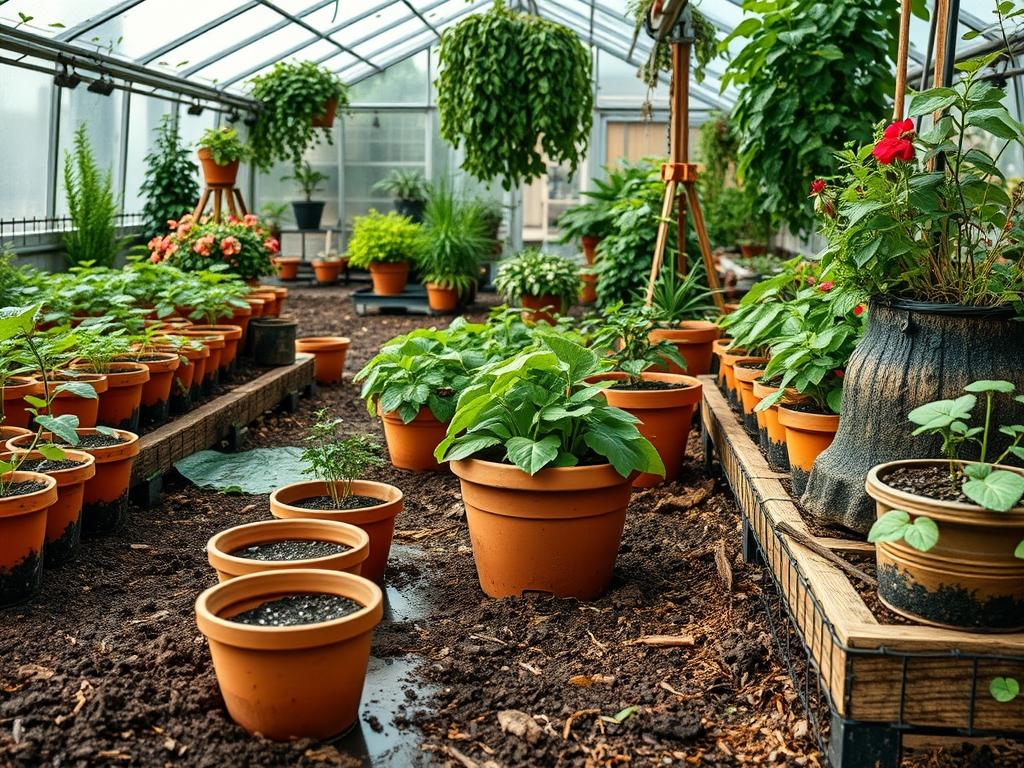
Effective landscape design often hinges on the delicate balance between aesthetic ambition and physiological reality. For many homeowners, the allure of a lush, tropical oasis is offset by the logistical nightmare of maintaining high moisture levels in environments that are naturally arid or subject to rapid evaporation. This is where mastering Self-Watering Pot Basics becomes an essential skill set for the modern outdoor consultant. Integrating tropical species into a temperate or subtropical landscape requires more than just high-quality soil; it demands a strategic approach to irrigation that mimics the consistent humidity of a rainforest floor. By utilizing sub-irrigation systems, you can ensure your Bird of Paradise or Monstera Deliciosa maintains its architectural vigor without the constant need for manual intervention, ultimately enhancing curb appeal and creating a more functional, low-stress outdoor living environment.
The challenge of container gardening in a professional landscape lies in the “pot effect,” where roots are confined and exposed to temperature fluctuations that ground-planted specimens rarely face. Traditional porous containers, while beautiful, often lead to rapid desiccation of the root ball. This is particularly detrimental to thirsty tropicals, which exhibit leaf scorch or stunt their growth at the first sign of water stress. The transition to self-watering technology allows for a consistent hydrostatic pressure within the soil, keeping the moisture content at an optimal level. From a design perspective, this functionality permits the placement of large, dramatic containers in sun-drenched locations, such as Natural Stone Pavers or south-facing Wood Decks, where standard pots would require watering twice a day.
Landscape Design Principles
Successful container integration requires adherence to core design principles that ensure the pots feel like an intentional part of the environment rather than an afterthought. Symmetry is one of the most effective ways to use self-watering containers. Placing a pair of identical Large Resin Planters flanking a primary entrance or the start of a Flagstone Walkway provides a sense of formality and arrival. When selecting the pots, the scale must be appropriate for the architectural features of the home. A 24-inch diameter pot is often the minimum size recommended for large tropicals to ensure enough soil volume to insulate the roots and provide a substantial water reservoir.
Focal points and elevation layers are equally critical. In a horizontal landscape, verticality can be achieved by using tall, upright tropicals like Musa (Banana Leaf) or Canna Lily. These plants act as living sculptures. To create depth, we employ the “thriller, filler, spiller” method, but within the context of a larger landscape, we must also consider the elevation of the pot itself. Placing containers on tiered Retaining Walls or custom-built Hardwood Plinths allows the designer to control the sightlines and ensure that the vibrant foliage is visible from different vantage points within the garden. This layering creates a sense of enclosure and privacy, turning a simple patio into a secluded sanctuary.
Irrigation planning within the landscape should consider the fill-cycle of these pots. While they are “self-watering,” the reservoirs still require refilling. Professional layouts often cluster these containers near a Frost-Free Hydrant or integrate a discreet 0.25-inch Drip Line that feeds directly into the Reservoir Fill Tube. This hybrid approach ensures that even during a vacation or a heatwave, the wicking action remains uninterrupted, maintaining the visual balance of the foliage without the erratic growth patterns caused by seasonal drought.
Plant and Material Selection
Choosing the right combination of botanical species and technical materials is the foundation of a successful sub-irrigation setup. Not all tropicals have the same metabolic rate, and their success depends heavily on the grade of the Potting Mix used within the container. A high-porosity mix containing Perlite and Sphagnum Peat Moss is essential to prevent the wicking system from becoming waterlogged.
| Plant Type | Sun Exposure | Soil Needs | Water Demand | Growth Speed | Maintenance Level |
| :— | :— | :— | :— | :— | :— |
| Monstera Deliciosa | Partial Shade | Aerated Mix | Moderate | Fast | Low |
| Canna Lily | Full Sun | Nutrient Rich | Very High | Rapid | Moderate |
| Elephant Ear | Partial Sun | Organically Rich | High | Fast | Moderate |
| Bird of Paradise | Full Sun | Well-Drained | Moderate | Medium | Low |
| Hardy Hibiscus | Full Sun | Moist Loam | High | Rapid | High |
The materials of the pots themselves are just as important as the plants. For professional installations, we recommend UV-Stabilized Polyethylene or Fiberglass. These materials are non-porous, which is a requirement for the sub-irrigation system to function, as it prevents moisture from escaping through the sidewalls. Refined River Rock or Expanded Clay Pebbles can be used at the base of the wicking chamber to facilitate steady capillary action without compacting the soil.
Implementation Strategy
Implementing a self-watering container layout begins with proper site grading. Even though the plants are in pots, the surface upon which they sit must be level to ensure the Water Reservoir fills evenly across the entire base. If a pot is tilted, the wicking mechanism may only reach one side of the root ball, leading to localized “dry spots” and eventual root death. Use a Level to check your Pavers or Gravel Bed before positioning large containers.
Once the site is prepared, focus on the internal assembly. Start by installing the Wicking Platform and the Overflow Drain. This drain is a critical component; it must be set at a height that allows excess rainwater to escape so the roots do not drown during a heavy storm. When adding the soil, do not simply dump it in. Pack the Wicking Chambers firmly with a damp Soilless Media to ensure a continuous capillary bridge. As you transition to the main root zone, keep the soil loose to promote aeration.
After planting your Philodendron or Ginger, apply a 2-inch layer of Organic Cedar Mulch or Polished Decorative Stone to the surface. This serves two purposes: it reduces surface evaporation, further extending the time between reservoir refills, and it provides a finished, professional look that blends the container into the surrounding landscape. For a seamless look, use Metal Edging to create a clean border around the base of the pots, filling the gap with Pea Gravel to assist with any drainage runoff from the overflow valves.
Common Landscaping Failures
The most frequent mistake in utilizing self-watering pots is the failure to account for “perched water tables.” If the soil mix is too heavy or contains too much clay, the water will not move upward efficiently; instead, the bottom of the pot becomes a stagnant anaerobic zone. This leads to root rot, characterized by a foul odor and yellowing leaves. Always use a professional-grade Potting Mix rather than “garden soil” or “topsoil,” which lack the necessary capillary properties.
Another common failure is improper scaling. Designers often choose pots that are too small for the aggressive root systems of tropical plants. A 12-inch diameter pot may look sufficient for a young Hibiscus, but within one season, the roots will likely clog the Sub-irrigation Reservoir, rendering the self-watering feature useless. Always plan for the mature size of the plant. Furthermore, overlooking the lack of an Overflow Drain in some consumer-grade models can lead to disaster during the rainy season, as the entire pot can turn into a swamp, killing even the most water-tolerant tropicals.
Seasonal Maintenance
Maintenance requirements shift as the photoperiod and temperatures change. In the spring, focus on “waking up” the system. Flush the Water Reservoir with a High-Pressure Hose to remove any accumulated salts or stagnant debris from the previous year. This is also the ideal time to incorporate a water-soluble, Slow-Release Fertilizer into the reservoir, providing a steady stream of nutrients as the tropicals enter their peak growth phase.
During the summer, the primary task is monitoring the Reservoir Fill Level. In extreme heat, even a large reservoir might deplete in 3 to 5 days. Use a Moisture Meter to verify that the top 3 inches of soil remain damp but not saturated. As autumn approaches and growth slows, reduce the frequency of refills. For non-hardy tropicals, the pots must be prepared for winter. If the containers stay outdoors, the reservoirs must be drained completely to prevent the water from freezing and cracking the Polyethylene Shell. If the plants are moved indoors, the wicking system should be cleaned to prevent the growth of indoor fungus gnats, which thrive in consistently moist soil.
Professional Landscaping FAQ
How do I know if the wicking system is working?
Check the top inch of soil 24 hours after filling the reservoir. If it feels cool and slightly damp, the capillary action is successful. If the surface is dusty, the wicking chamber may be improperly packed or the soil too dry.
Can I use these pots for all tropical plants?
Most thirsty tropicals thrive, but those requiring “dry feet,” like certain Succulents or Orchids, may struggle. The system is best for high-transpiration species like Palms, Ferns, and Leafy Aroids that prefer consistent, even moisture levels.
Does the reservoir water become stagnant or smelly?
Stagnation is avoided by regular refills and the use of an Overflow Hole that allows for gas exchange. Adding a small amount of Activated Charcoal to the bottom of the reservoir can also help keep the water fresh and odorless.
How often should I clean the internal reservoir?
A thorough cleaning should occur once per year, typically in the spring. Use a Long-Handled Brush and a mild vinegar solution to remove algae or mineral scales that can clog the wicking pores and reduce the system’s efficiency.
Will heavy rain ruin my self-watering setup?
Not if the pot has a functional Overflow Drain. This allows excess water to bypass the reservoir and exit the container. Without this feature, heavy rain will flood the root zone and eventually cause the plant to die.